FESTIVE RUDOLPH CHEESEBALL
Looking for a fun and festive appetizer to wow your holiday guests? This Rudolph Cheeseball is the perfect blend of taste and holiday cheer.
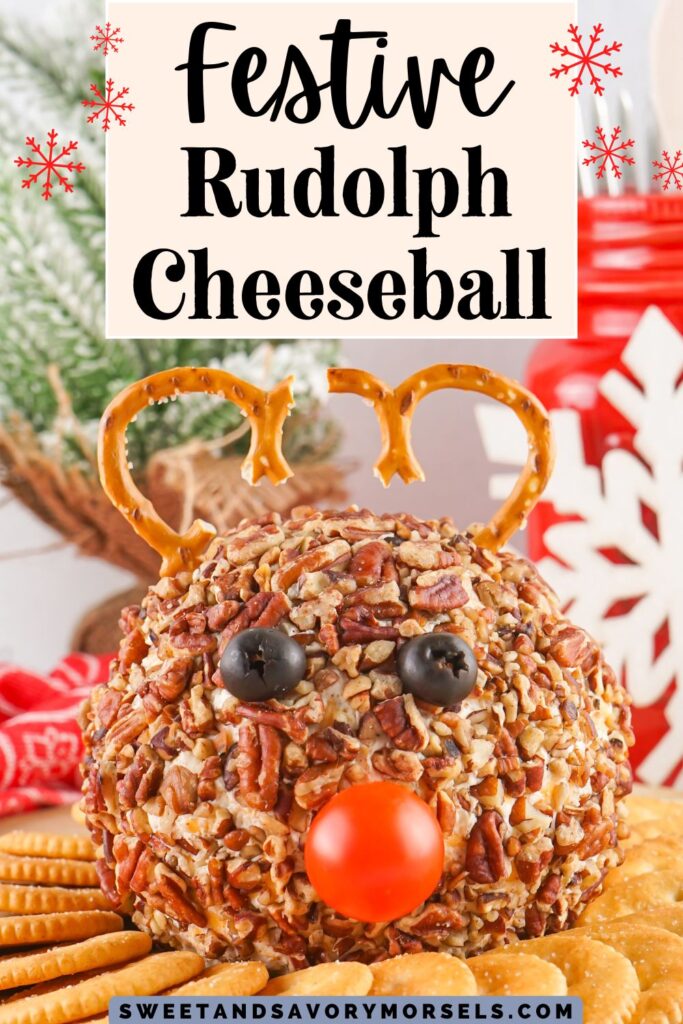
Topped with playful pretzel antlers and a cherry tomato nose, this Rudolph Cheeseball is easy to assemble and makes a memorable centerpiece for any festive gathering. Let’s dive into how you can make this show-stopping, crowd-pleasing holiday snack!
A Showstopping Holiday Appetizer
This Rudolph Cheeseball is a true showstopper, blending delicious flavors with eye-catching holiday flair! Whether you're hosting a holiday dinner, a family gathering, or a festive party, this appetizer is sure to steal the spotlight.
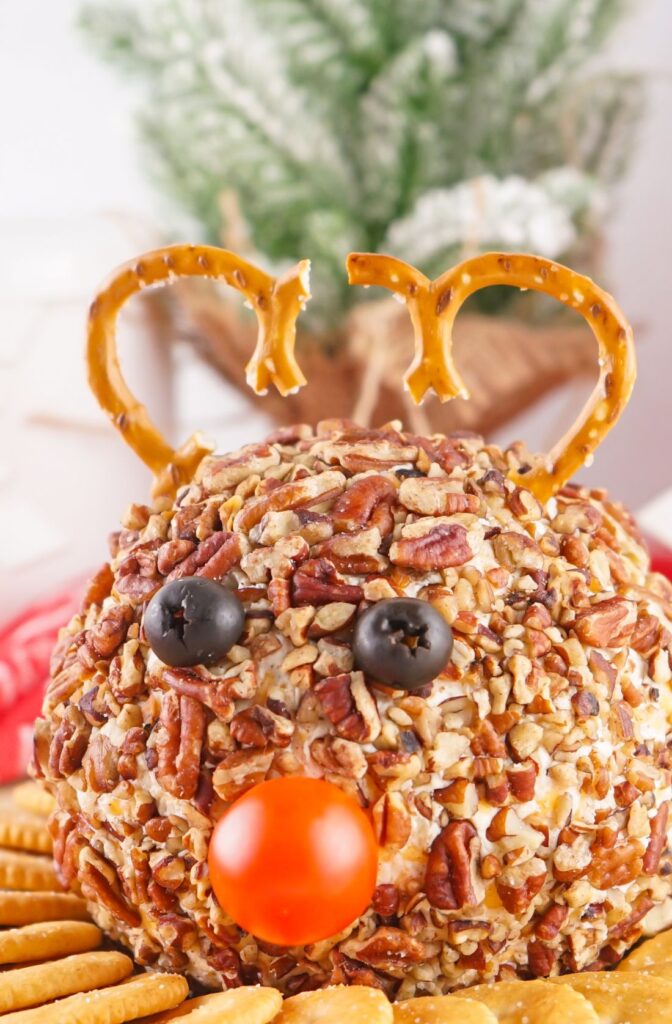
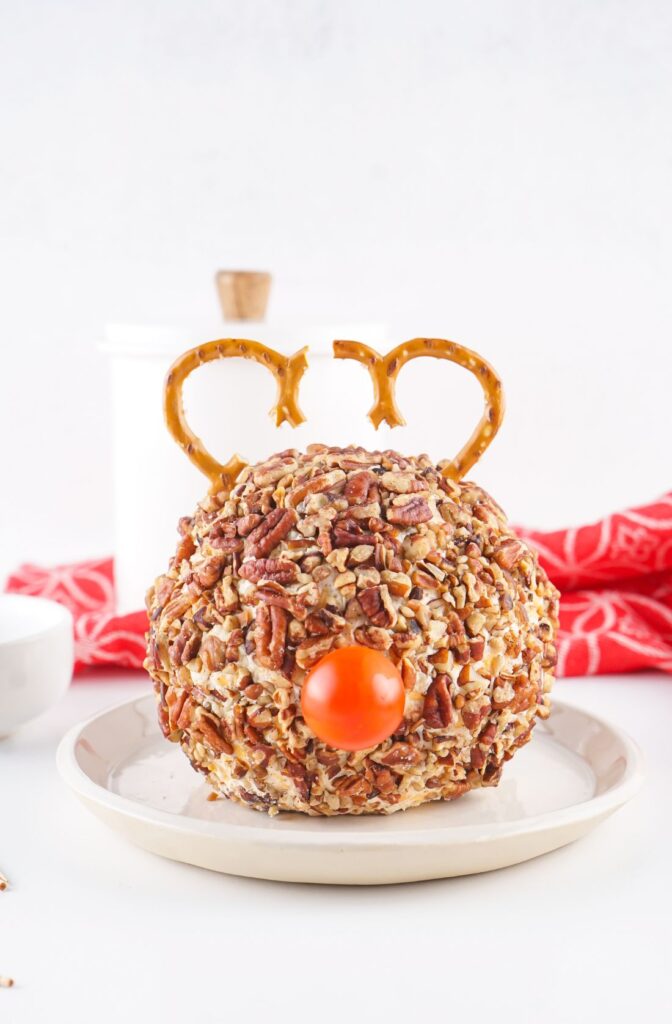
What makes this cheeseball extra special is its fun, festive decoration. Shaped to resemble Rudolph the Red Nose Reindeer himself, the cheeseball is topped with pretzel antlers, olive eyes, and a bright cherry tomato for the iconic red nose!
One of the best things about this recipe is its versatility. With a few tweaks, you can easily adjust the flavors to suit different tastes or dietary needs. Try rolling the cheeseball in herbs or different nuts, or even add a hint of spice for an extra kick.
Why You'll Love this Recipe
You’ll love this Rudolph Cheeseball recipe because it’s a delightful mix of fun and flavor that adds instant holiday charm to any gathering. It’s simple to make, even for beginner cooks, yet the results are impressive and festive.
Plus, it’s easily customizable, allowing you to play around with flavors and toppings to suit your preferences. Whether you’re looking to bring something unique to a holiday potluck or want an appetizer that doubles as a conversation piece, this recipe is sure to become a new seasonal favorite!
Ingredients for Rudolph Cheeseball
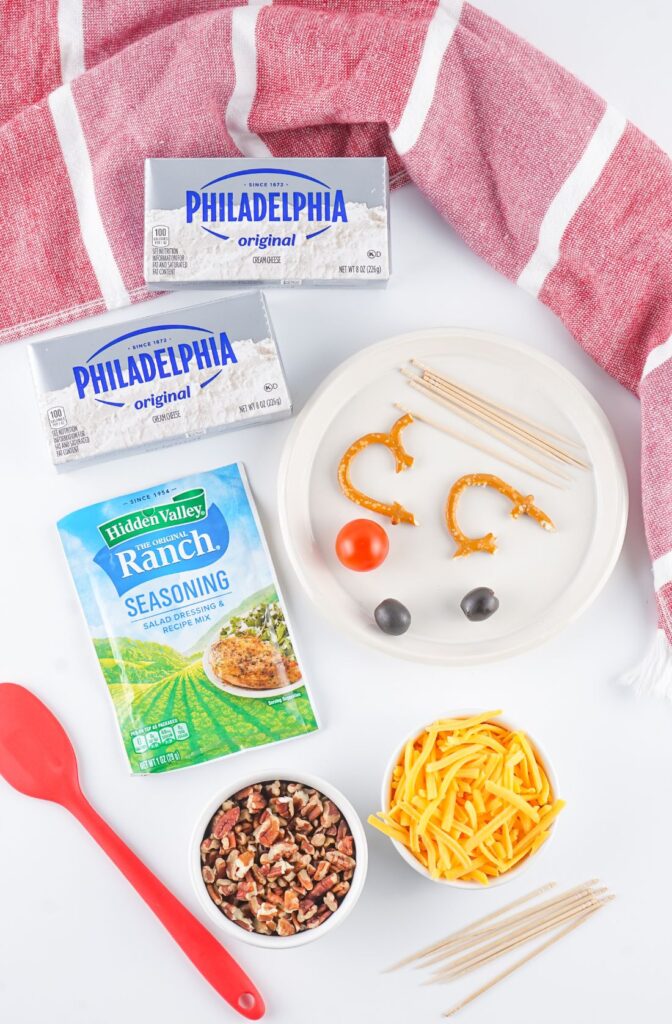
- 16 Ounces Cream Cheese, room temperature
- 2 ½ Cups Shredded Cheddar Cheese
- 1 Cup Chopped Pecans
- 1 Packet Ranch Seasoning (1 ounce)
- 2 Black Olives
- 1 Cherry Tomato
- 2 Pretzels (regular not mini)
- Ritz Crackers (optional for serving)
Tools You'll Need
- 3 Toothpicks
- Rubber Gloves (optional)
- Plastic Wrap
- Medium Mixing Bowl
- Measuring Cup
Instructions for this Rudolph Cheeseball
Step 1
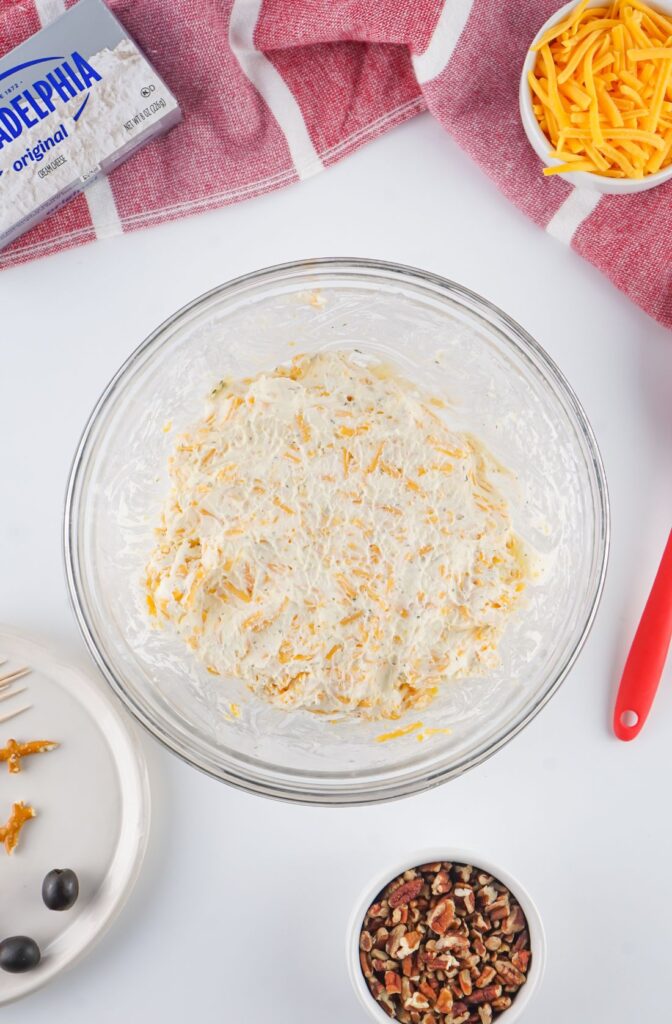
In a medium mixing bowl, combine the cream cheese, ranch seasoning, and shredded cheddar cheese. Mix well.
Step 2
Using gloves if desired, roll the mixture into a ball.

Step 3
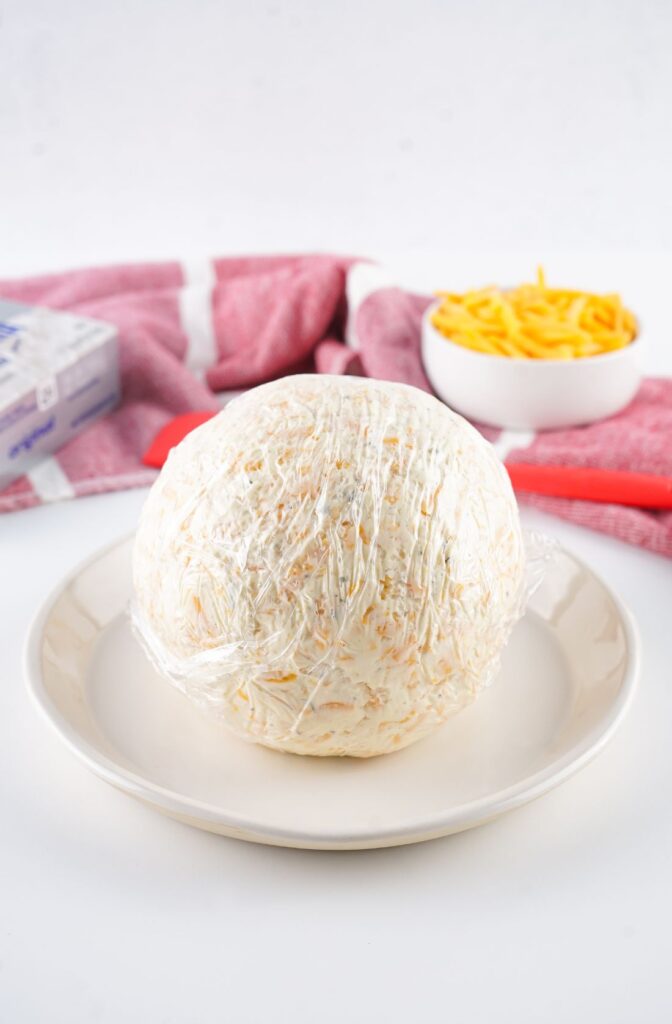
Wrap in plastic wrap and place in the fridge to chill for about 4 hours or until it can be handled.
Step 4
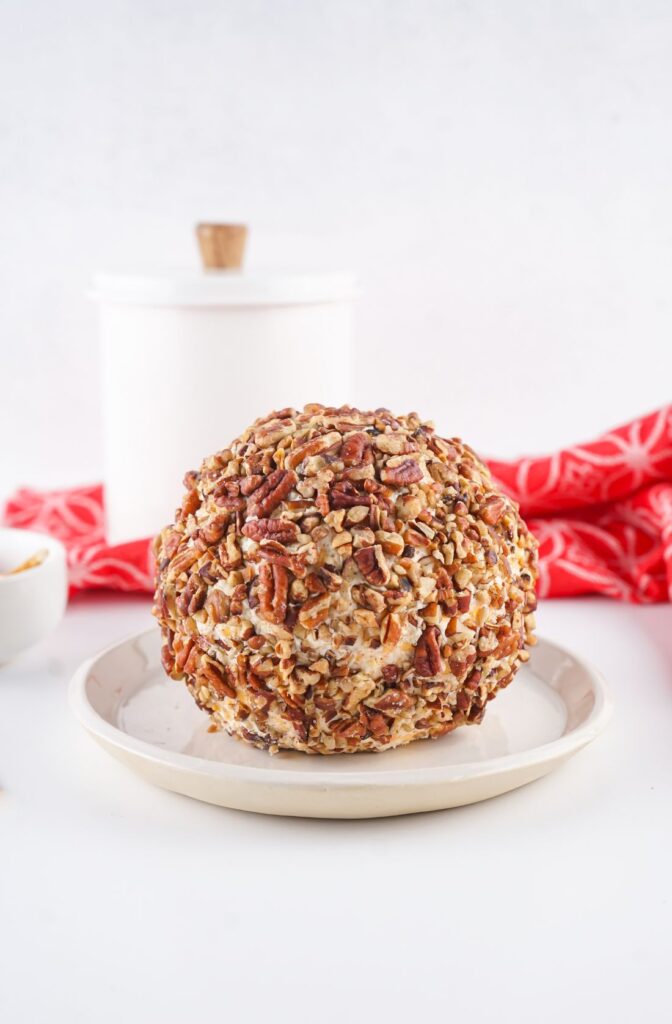
Place the chopped pecans in a cereal sized bowl and break up any larger pieces you see.

Step 5
Using gloves once again, if desired, scoop the pecans into your hand and press them into the cheeseball.
This may seem difficult at first because the cheeseball will be a little hard from chilling in the fridge, but that’s ok.
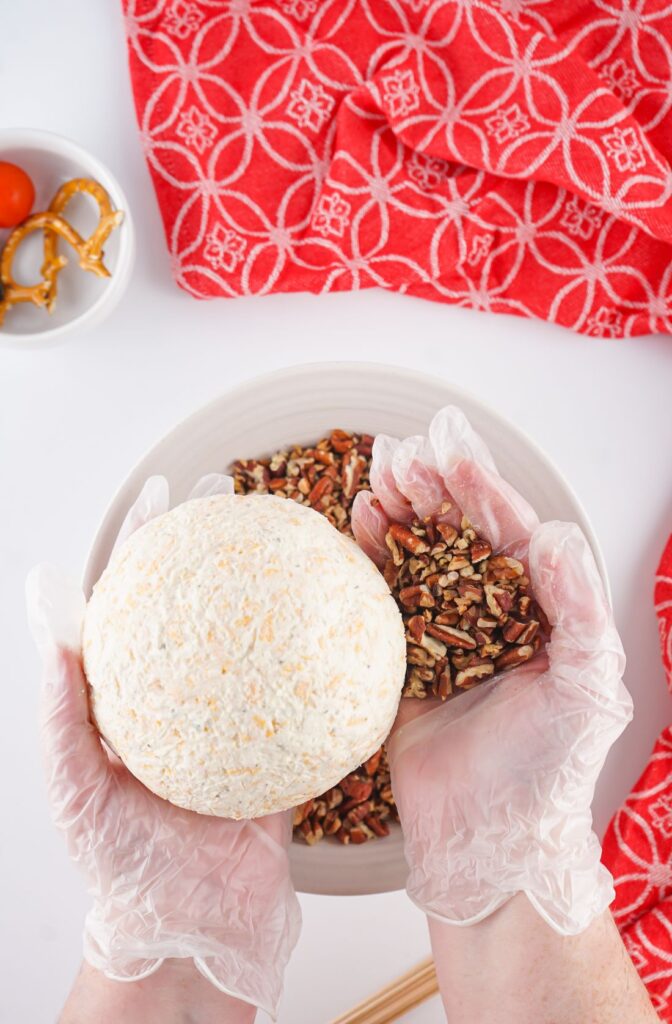
You might not end up using all the pecans, but keep pressing until you can’t really see the cheeseball underneath the pecans.
Do not coat the flat bottom part of the cheeseball or it won’t sit properly.
Step 6
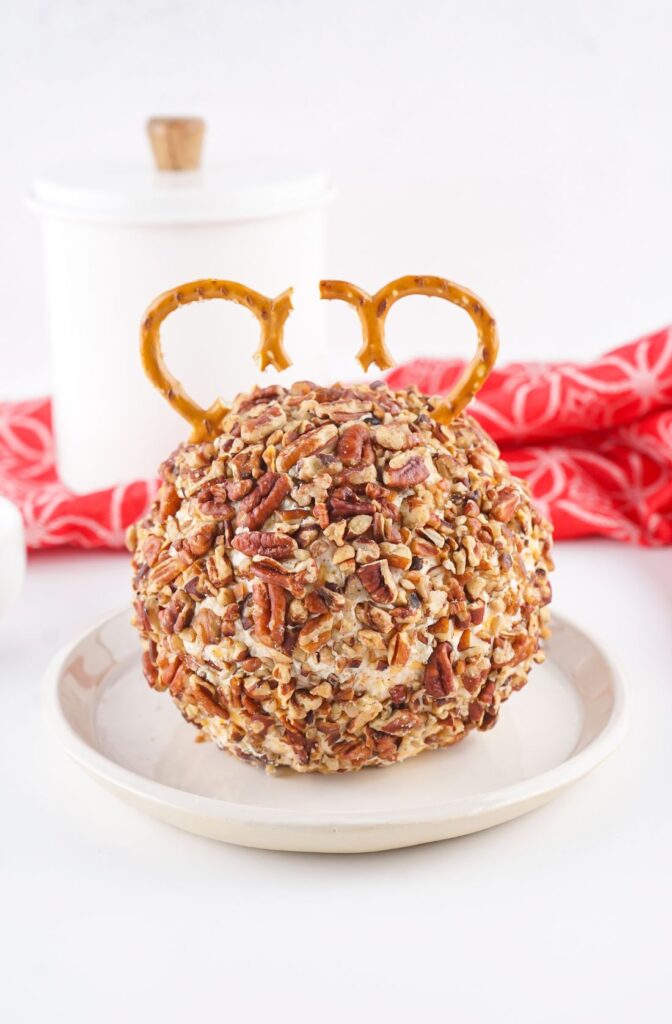
For the antlers, I broke two regular sized pretzels in half, and then removed the little center portions from the best pieces.
Utz was the brand I used for the pretzels and I loved the way they looked. If you don’t want to mess with breaking the pretzels, just use a whole pretzel for each antler.
Step 7
Stick an antler into the top left side of the cheeseball and repeat on the right top side with the other antler.
Step 8
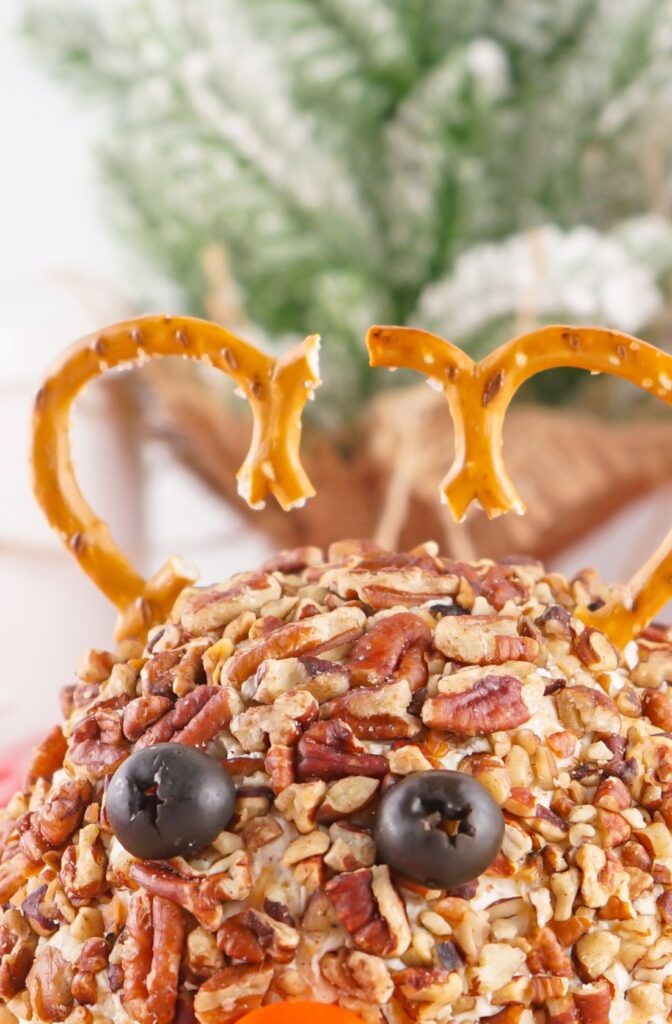
Push your toothpicks into place for the eyes and nose, leaving the pointy part slightly poking out.
Step 9
Cut both olives in half, and use the side without the big hole as the eyes. I attached them to the toothpicks using the thickest edge of the inside of the olive. This step you will need to be gentle with.
Step 10
Attach the cherry tomato to the toothpick for the nose and gently push it into the cheeseball so that it nestles more closely to the cheeseball, making it look more natural.
Serve on a platter with your favorite crackers and enjoy!
Recipe Tips and Tricks
Here are some tips and tricks to make your Rudolph Cheeseball even better:
Cheeseball Preparation Tips:
- Soften Cream Cheese: Ensure the cream cheese is softened to room temperature before mixing to achieve a smooth, creamy texture.
- Chill for Shape: Chilling the cheeseball for at least 4 hours (or even overnight) makes it firmer and easier to coat and shape.
- Use Gloves: Wearing gloves when shaping and coating the cheeseball helps keep the mixture from sticking to your hands.
- Double Batch: Make a double batch and freeze one half for a later holiday party or gathering.
Assembly and Decoration Tips:
- Press Gently: When attaching pecans, press gently but firmly so they stick to the cheeseball without damaging the shape.
- Toothpick Placement: Insert toothpicks for eyes and nose at an angle to help them stay secure, especially if transporting.
- Create a Base: Before placing the cheeseball on a platter, add a small circle of crackers underneath to keep it steady.
Serving Tips:
- Room Temperature Serving: Let the cheeseball sit at room temperature for 15-20 minutes before serving for a smoother, spreadable texture.
- Serve with Variety: Offer an assortment of crackers, breadsticks, and veggies like carrots or celery for different flavor and texture options.
- Holiday Platter: Place festive garnishes like rosemary sprigs, cranberries, or sliced peppers around the cheeseball for an extra holiday touch.
Storage Tips:
- Wrap Tightly: Store any leftovers wrapped tightly in plastic wrap to keep it fresh for up to 3 days in the fridge.
- Freeze for Later: Freeze the cheeseball before adding the decorations. Thaw it in the fridge overnight, add toppings, and serve fresh.

Recipe Variations, Additions, and Substitutions
Here are some variations, additions, and substitutions for the Rudolph Cheeseball recipe to add a creative twist:
Cheese Ball Mixture Variations:
- Flavored Cream Cheese: Use flavored cream cheese, such as garlic & herb or jalapeño, for extra taste.
- Bacon and Chive: Add crumbled bacon and chopped chives to the cheese mixture for a smoky flavor.
- Spicy Kick: Mix in finely chopped jalapeños or a dash of hot sauce for a spicy cheeseball.
- Italian Herb: Add Italian seasoning, a touch of garlic powder, and shredded mozzarella for an Italian twist.
- Buffalo Style: Add a splash of buffalo sauce and blue cheese crumbles for a buffalo-flavored cheeseball.
Coating Variations:
- Alternative Nuts: Use crushed walnuts, almonds, or pistachios instead of pecans for a different nutty flavor.
- Herb Coating: Roll the cheeseball in chopped fresh herbs like parsley, chives, or dill for a fresh, green coating.
- Pretzel Crumbs: Crush extra pretzels and roll the cheeseball in the crumbs to add crunch and complement the antlers.
- Cheese Coating: Cover the cheeseball with finely grated parmesan or cheddar for extra cheesiness.
Antler Alternatives:
- Breadsticks or Pocky Sticks: Use long breadsticks or Pocky chocolate sticks for a unique look.
- Twisted Pretzels: Use twisted pretzels as antlers for a more intricate look without needing to break them.
- Carrot Sticks: Thinly slice carrots into long sticks for an edible, colorful antler substitute.
Nose and Eye Substitutes:
- Bell Pepper Nose: Use a small piece of red bell pepper for a sweet, red nose instead of a cherry tomato.
- Candy Eyes: Purchase edible candy eyes for a fun, whimsical look, especially if serving for children.
- Pimiento-Stuffed Olives: For the eyes, use pimiento-stuffed olives to add a pop of red and green.
Serving Ideas and Additions:
- Savory Garnishes: Serve with rosemary sprigs or thyme around the cheeseball for a festive touch.
- Fruit Pairing: Add sliced apples, grapes, or pear slices on the platter for a sweet and savory combo.
- Honey Drizzle: Drizzle a touch of honey over the cheeseball for added sweetness and a glossy finish.
These variations will make your Rudolph Cheeseball customizable and perfect for any festive gathering!

FAQs
Q: Can I make the Rudolph Cheeseball ahead of time?
A: Yes! You can prepare the cheeseball a day in advance, wrap it tightly in plastic, and store it in the fridge. Add the decorations just before serving for the freshest look.
Q: How long can I store leftovers?
A: Leftovers can be wrapped and stored in the fridge for up to 1 week. Just keep it tightly wrapped to maintain freshness.
Q: What if I don’t like pecans?
A: If you don’t like pecans, feel free to substitute with other nuts, like almonds or walnuts, or use an alternative coating like crushed crackers or herbs.
Q: How can I make the Rudloph Cheeseball spicier?
A: To make the cheeseball spicier, add a dash of hot sauce, mix in diced jalapeños, or use a spicy ranch seasoning to give it a little heat.
Q: What should I serve with the Rudolph Cheeseball?
A: Serve the cheeseball with a variety of crackers, breadsticks, and fresh veggies like celery and carrot sticks to offer different options for dipping.
Q: Can I make this recipe vegetarian?
A: Absolutely! You can make this recipe vegetarian by ensuring that your ranch seasoning and other ingredients are free from animal products, making it a vegetarian-friendly cheeseball.
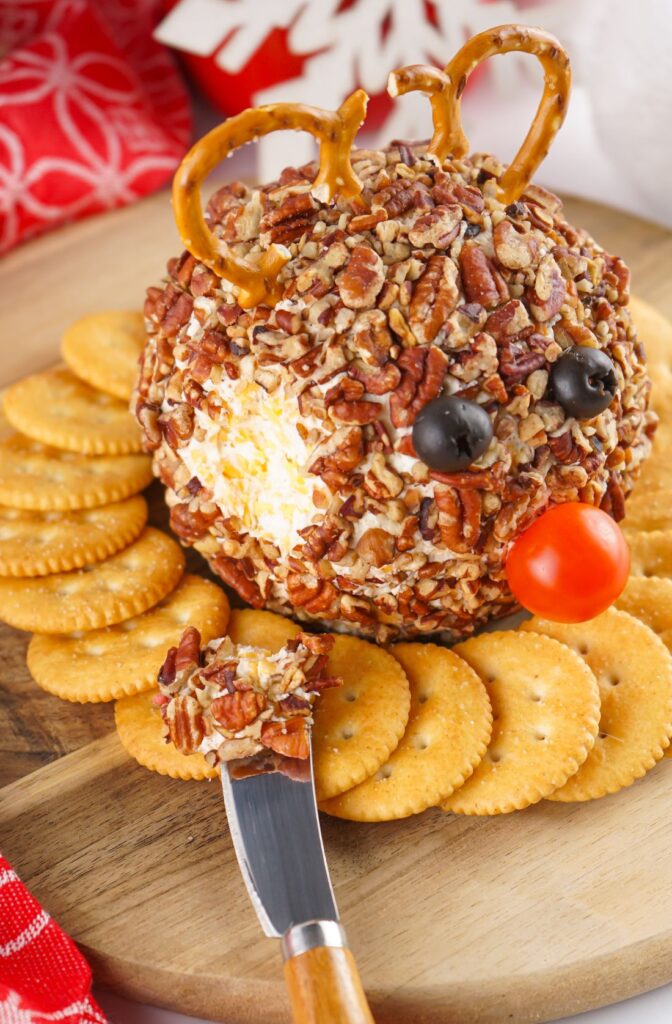
This Rudolph Cheeseball is a festive, flavorful, and fun holiday appetizer that brings joy to any gathering. With its creamy texture, savory seasonings, and playful decorations, it’s sure to impress guests of all ages.
Serve it with your favorite crackers and veggies for an unforgettable holiday treat! You can also try it with our holiday appetizers including Christmas Themed Red Velvet Cake Balls and Grinch Oreo Balls. You can pair it with our festive holiday drink the Naughty Elf Cocktail.

Rudolph Cheeseball Recipe
FESTIVE RUDOLPH CHEESEBALL
Equipment
- 3 Toothpicks
- Rubber Gloves (optional)
- Plastic Wrap
- Medium Mixing Bowl
- Measuring Cup
Ingredients
- 16 Ounces Cream Cheese room temperature
- 2 ½ Cups Shredded Cheddar Cheese
- 1 Cup Chopped Pecans
- Packet Ranch Seasoning 1 ounce
- 2 Black Olives
- 1 Cherry Tomato
- 2 Pretzels regular not mini
- Ritz Crackers optional for serving
Instructions
- In a medium mixing bowl, combine the cream cheese, ranch seasoning, and shredded cheddar cheese.
- Mix well.
- Using gloves if desired, roll the mixture into a ball.
- Wrap in plastic wrap and place in the fridge to chill for about 4 hours or until it can be handled.
- Place the chopped pecans in a cereal sized bowl and break up any larger pieces you see.
- Using gloves once again, if desired, scoop the pecans into your hand and press them into the cheeseball.
- This may seem difficult at first because the cheeseball will be a little hard from chilling in the fridge, but that’s ok.
- You might not end up using all the pecans, but keep pressing until you can’t really see the cheeseball underneath the pecans.
- Do not coat the flat bottom part of the cheeseball or it won’t sit properly.
- For the antlers, I broke two regular sized pretzels in half, and then removed the little center portions from the best pieces. Utz was the brand I used for the pretzels and I loved the way they looked.
- If you don’t want to mess with breaking the pretzels, just use a whole pretzel for each antler.
- Stick an antler into the top left side of the cheeseball and repeat on the right top side with the other antler.
- Push your toothpicks into place for the eyes and nose, leaving the pointy part slightly poking out.
- Cut both olives in half, and use the side without the big hole as the eyes.
- I attached them to the toothpicks using the thickest edge of the inside of the olive.
- This step you will need to be gentle with.
- Attach the cherry tomato to the toothpick for the nose and gently push it into the cheeseball so that it nestles more closely to the cheeseball, making it look more natural.
- Serve on a platter with your favorite crackers and enjoy!
Notes
● Be sure to sort through your chopped pecans and break the larger pieces into smaller pieces. This makes it nicer for coating the cheeseball and looks better as well.
● My toothpicks were super long, so I broke them down so they were easier to work with.
● Be sure to sit your cheeseball in the fridge exactly how you want it to sit once it’s ready because the cheeseball hardens once chilled. It will sit the way it hardens in the refrigerator.
● If you don’t like the way the nose and eyes look, you can pull the toothpicks out and reposition them.


