HOLIDAY MAGIC: CRAFTING AN ELF-THEMED COOKIE AND CANDY BOARD
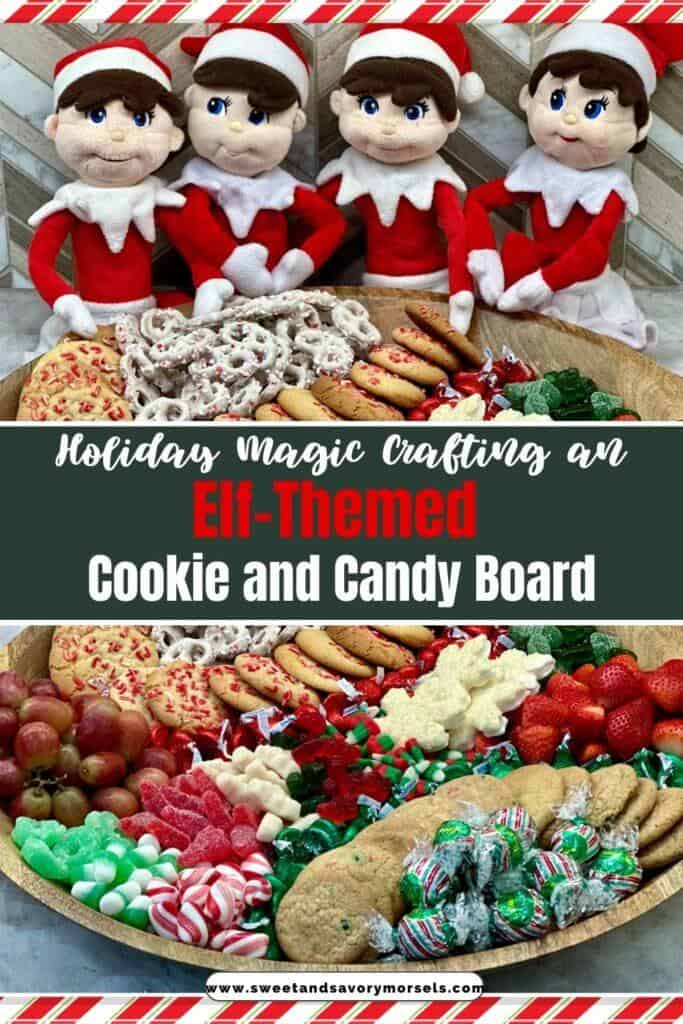
Embrace the festive spirit with a delightful elf-themed cookie and candy board, perfect for spreading holiday cheer! This whimsical creation is more than just a collection of sweets; it's a canvas for your creativity and a way to bring the magic of the season into your home.
Whether you're hosting a cozy family gathering or a lively holiday party, this enchanting assortment of cookies, sparkling candies, and colorful treats is sure to captivate and delight guests of all ages.
Let's dive into the joyous journey of assembling this charming and delicious centerpiece that promises to be the highlight of your holiday celebrations.
Why You'll Love This Elf-Themed Cookie and Candy Board Recipe
- The elf-themed board adds festive fun to holidays, delighting both kids and adults.
- It's easily customizable with various cookie shapes, candies, and colors to suit your preferences.
- Ideal as a holiday event centerpiece, it suits both casual and formal gatherings.
- Making the board is a fun, engaging activity for family and friends.
- Creating and enjoying this board can become a cherished holiday tradition.
Equipment Needed to Make Elf-Themed Cookie and Candy Board
- Hand Mixer
- Charcuterie Board or Platter
- Wooden Spoon
- Wax Paper or Parchment Paper (optional)
- Spatula (optional)
- Elf Stuffed Animals
Ingredients you'll need for Your Elf-Themed Cookie and Candy Board
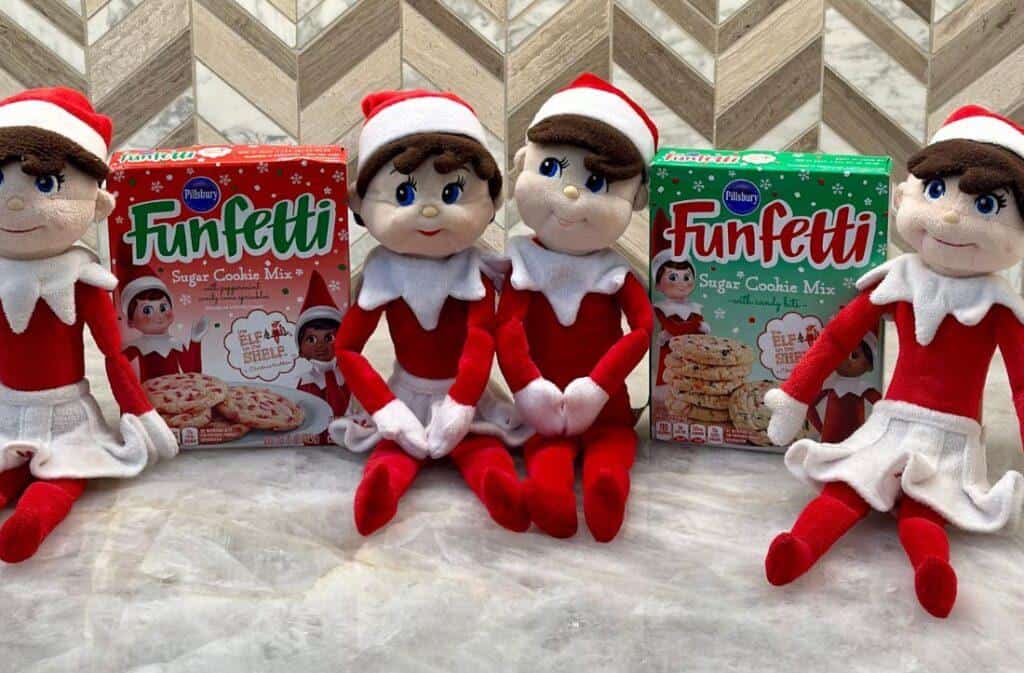
- One Funfetti Sugar Cookie Mix with Peppermint Candy Cane Sprinkles
- One Funfetti Sugar Cookie Mix with Candy Bits
- Butter and eggs as directed on box
- Candy Charcuterie Box (contains gummy candy, gum drops, and candy corn listed below)
- Peppermints
- Green Gum Drops
- Sugar Coated Green Gummy Rings
- Red Sugar Coated Trees
- Green Sugar Coated Trees
- Green and White Gum Drops
- Red White and Red Candy Corn
- White Gummy White Snowmen
- Red and Green Gummy Bears
- Lindor Peppermint Cookie Chocolates
- Hershey Kisses, Green and Red
- Peppermint Coated White Chocolate Pretzels
- Strawberries
- Red Grapes
- White Marshmallow Star Hot Chocolate Toppers
How to Make a Elf-Themed Cookie and Candy Themed Board
Step 1: Mix and Bake
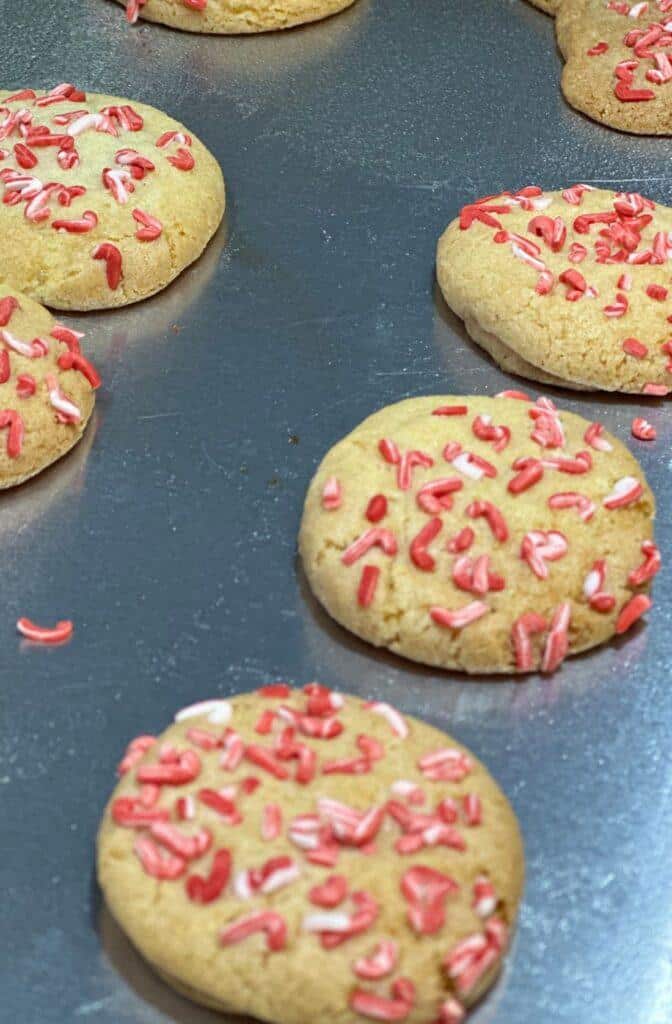
Bake the cookies according to the instructions on the box, then let them cool completely.
Step 2: Arrange Sugar Cookies on the Board
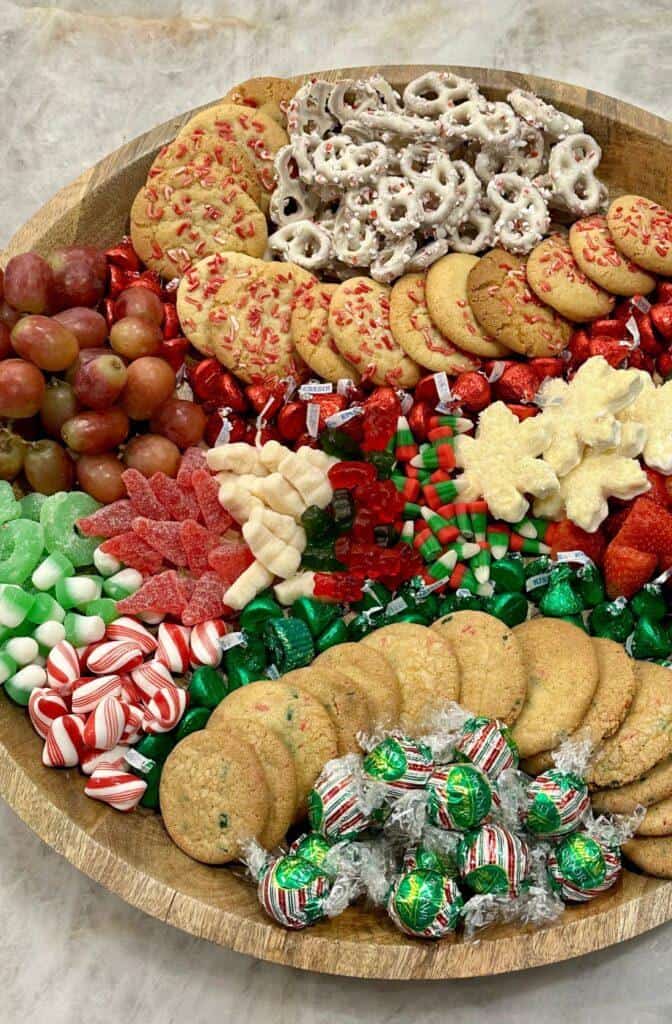
Arrange the sugar cookies on the opposite sides of the board.

Step 3: Arrange the Lindor Chocolate and Green Hershey Kisses on the Board
Arrange the Lindor Peppermint Cookie Chocolates inside next to the Funfetti Sugar Cookies with Candy Bits.
Arrange the green Hershey Kisses outside the Funfetti Sugar Cookies with Candy Bits.

Step 4: Arrange the Red Hershey Kisses and White Chocolate Covered Pretzels on the Board
Arrange the red Hershey Kisses outside the Funfetti Sugar Cookies with Peppermint Bits on the Opposite Side of the Board.
Arrange the white chocolate covered pretzels inside next to the Funfetti Sugar Cookies with Peppermint Bits.

Step 5: Arrange the Strawberries and Grapes
Arrange the strawberries next to the green Hershey Kisses on one side of the board.
Arrange the red grapes next to the red Hershey Kisses on the opposite side of the board.

Step 6: Arrange the Peppermints and Green Gummy Candy
Arrange the Peppermints next to the green Hershey Kisses.
Arrange the green sugar coated trees and green gummy bears on the opposite side fo the board.

Step 7: Arrange the White Star Hot Chocolate Toppers
Arrange the white star hot chocolate toppers next to the green gummy bears and trees.

Step 8: Arrange the Green Sugar Coated Rings, Green Gum Drops and Red, White, and Green Candy Corn
Arrange the green sugar coated gummy rings next to the grapes.
Arrange the green and white gum drops in the open are between the peppermints and the sugar coated green gummy rings.
Arrange the red, white, and green candy corn next to the white star hot chocolate toppers.
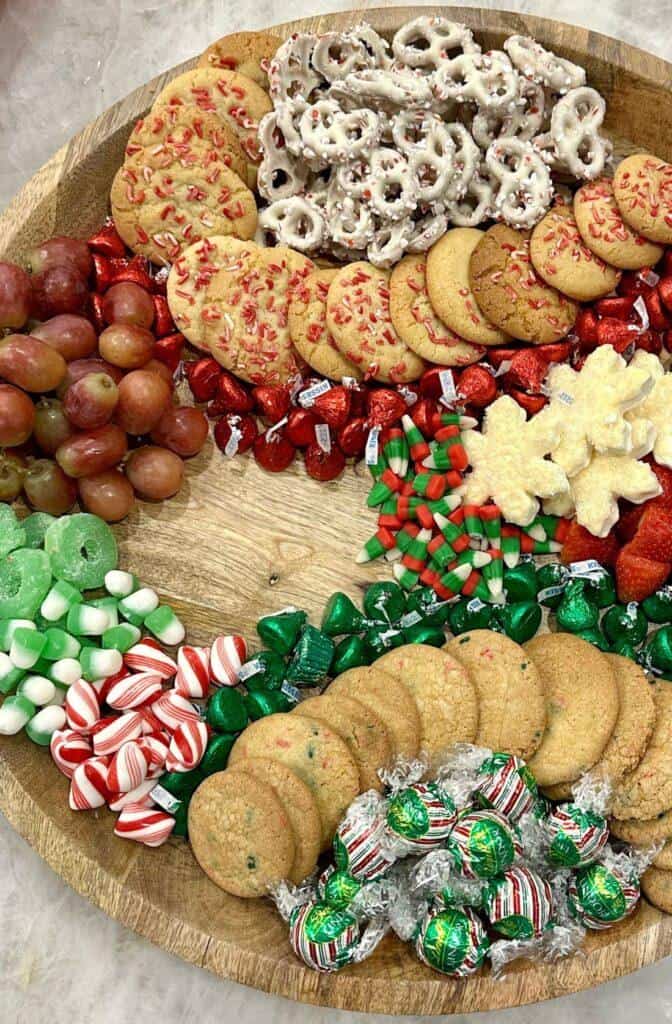
Step 9: Arrange the Red Sugar Coated Trees, White Gummy Snowmen, and Red and Green Gummy Bears
Arrange the red sugar coated trees next to the green and white gum drops.
Arrange the white gummy snowmen in the opening next to the red sugar coated trees.
Finally, arrange the red and green gummy bears in the opening between the white snowmen and the red, green, and white candy corn.
Step 10: Place your Elfs around your Board and Serve and Enjoy
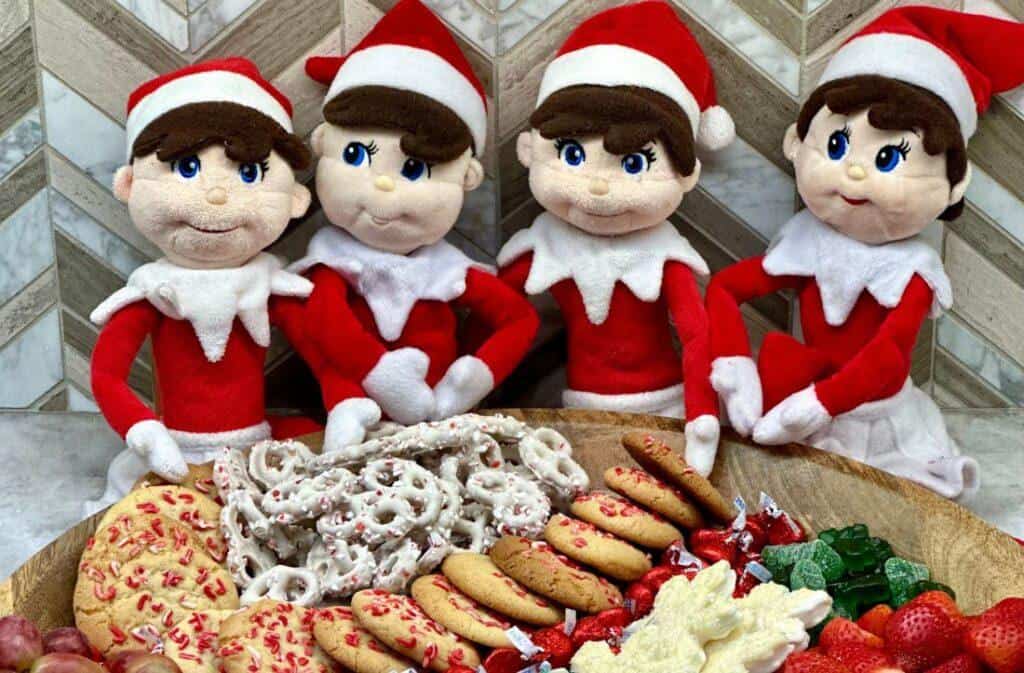
Place your elfs around your board. Serve and Enjoy!
What to Serve with Your Elf-Themed Cookie and Candy Board
Sides
Adding savory sides to your elf-themed cookie and candy board creates a well-rounded and satisfying holiday spread. Pair with a Christmas Tree Charcuterie Board, a blend of savory finger foods like cheese and crackers, which offer a delightful contrast to the sweetness of the cookies and candies.
Desserts
Complementing your elf-themed cookie and candy board with additional desserts can elevate your festive feast. Consider adding Christmas Themed Red Velvet Cake Balls.
Drinks
For a cozy and family-friendly touch, consider a Hot Cocoa Board featuring rich hot chocolate topped with fluffy marshmallows, complemented by warm apple cider. This inviting combination offers comforting warmth that pairs wonderfully with the sweet treats on the board, creating a harmonious blend of flavors and coziness.
For adult gatherings, consider Tipsy Peppermint Mocha Cocktail or a Naughty Elf Cocktail, adding a fun and sophisticated twist that aligns beautifully with the festive theme.
Popular Substitutions & Additions
For your elf-themed cookie and candy board, adapt it to suit various dietary needs with thoughtful substitutions. Swap regular cookies for gluten-free versions, use dairy-free chocolates and candies, and include sugar-free options for those watching their sugar intake.
Enhance your board with a mix of additions for greater variety. Include nuts and dried fruits for natural sweetness, and add elf-shaped gingerbread cookies or candy canes for extra festivity.
Balance the sweetness with savory snacks like pretzels and cheese cubes, and fresh fruits for a refreshing touch.
How to Store Your Elf-Themed Cookie and Candy Board
Best Way to Store Elf-Themed Cookie and Candy Board
Separate the cookies and candies into different airtight containers. Place cookies in one, ideally layered with parchment paper to preserve their decoration and flavor.
Store candies in their original packaging or in zip-lock bags. Keep everything in a cool, dry place away from direct sunlight and high temperatures to maintain freshness.
Avoid refrigerating unless necessary, as it can alter the texture. Reassemble the board just before serving for the best presentation and taste.
How Long Will Elf-Themed Cookie and Candy Board Last in the Fridge?
An elf-themed cookie and candy board will typically last in the fridge for up to a week. It's important that refrigeration can affect the texture and taste of certain items, especially cookies, which may become soggy.
Candies are generally more resilient but can also suffer in flavor and texture when refrigerated.
It's best to store them in a cool, dry place instead of the fridge, unless they contain perishable ingredients.
Can I Freeze Elf-Themed Cookie and Candy Board
Cookies can generally be frozen with good results, especially if they're unfrosted; simply wrap them tightly and store in airtight containers.
Candy might not fare as well in the freezer, as temperature changes can alter their texture and taste.
It's advisable to freeze only the cookies and assemble the board with fresh candies when you're ready to serve.
FAQs
Can I Make This Board Allergy-Friendly?
Absolutely! Use allergy-friendly recipes for cookies and carefully select candies that are free from common allergens like nuts, dairy, or gluten.
Can This Board Be Made Vegan or Gluten-Free?
Absolutely! Use vegan and gluten-free cookie recipes and candies to cater to dietary restrictions.
How Can I Make the Board More Budget-Friendly?
Opt for homemade cookies and bulk-purchase candies. You can also get creative with less expensive decor like ribbon and paper cutouts.
Can I Incorporate Other Holiday Themes into the Board?
Yes, you can blend in other holiday themes like snowflakes, stars, or traditional Christmas colors to add variety to the elf theme.

ELF-THEMED COOKIE AND CANDY BOARD
Equipment
- Hand Mixer
- Charcuterie Board or Platter
- Wooden Spoon
- Wax Paper or Parchment Paper optional
- Spatula optional
- Elf Stuffed Animals
Ingredients
- 1 box Funfetti Sugar Cookie Mix with Peppermint Candy Cane Sprinkles
- 1 box Funfetti Sugar Cookie Mix with Candy Bits
- Butter as directed on box
- Eggs as directed on box
- 1 Candy Charcuterie Box if available
- Peppermints
- Green Gum Drops
- Sugar Coated Green Gummy Rings
- Red Sugar Coated Trees
- Green Sugar Coated Trees
- Green and White Gum Drops
- Red, White, and Green Candy Corn
- White Gummy White Snowmen
- Red and Green Gummy Bears
- Lindor Peppermint Cookie Chocolates
- Hershey Kisses Green and Red
- Peppermint Coated White Chocolate Pretzels
- Strawberries
- Red Grapes
- White Marshmallow Star Hot Chocolate Toppers
Instructions
- Bake the cookies according to the instructions on the box, then let them cool completely.
- Arrange the sugar cookies on the opposite sides of the board.
- Arrange the Lindor Peppermint Cookie Chocolates inside next to the Funfetti Sugar Cookies with Candy Bits.
- Arrange the green Hershey Kisses outside the Funfetti Sugar Cookies with Candy Bits.
- Arrange the red Hershey Kisses outside the Funfetti Sugar Cookies with Peppermint Bits on the Opposite Side of the Board.
- Arrange the white chocolate covered pretzels inside next to the Funfetti Sugar Cookies with Peppermint Bits.
- Arrange the strawberries next to the green Hershey Kisses on one side of the board.
- Arrange the red grapes next to the red Hershey Kisses on the opposite side of the board.
- Arrange the Peppermints next to the green Hershey Kisses.
- Arrange the green sugar coated trees and green gummy bears on the opposite side fo the board.
- Arrange the white star hot chocolate toppers next to the green gummy bears and trees.
- Arrange the green sugar coated gummy rings next to the grapes.
- Arrange the green and white gum drops in the open are between the peppermints and the sugar coated green gummy rings.
- Arrange the red, white, and green candy corn next to the white star hot chocolate toppers.
- Arrange the red sugar coated trees next to the green and white gum drops.
- Arrange the white gummy snowmen in the opening next to the red sugar coated trees.
- Finally, arrange the red and green gummy bears in the opening between the white snowmen and the red, green, and white candy corn.
- Place your elfs around your board or platter. Serve and Enjoy!
Did you make this recipe?
If you get a chance to try it, let us know! Leave us a comment below, or share it with a picture on Instagram or Facebook! Don't forget to tag us @sweetandsavorymorsels or tag us using #sweetandsavorymorsels so we can see so we can see what amazing meals you are cooking!
